The Desktop Version
Certificates are linked to Inspection/Landlord Details and Address, You will be required to input this information when creating a new certificate.
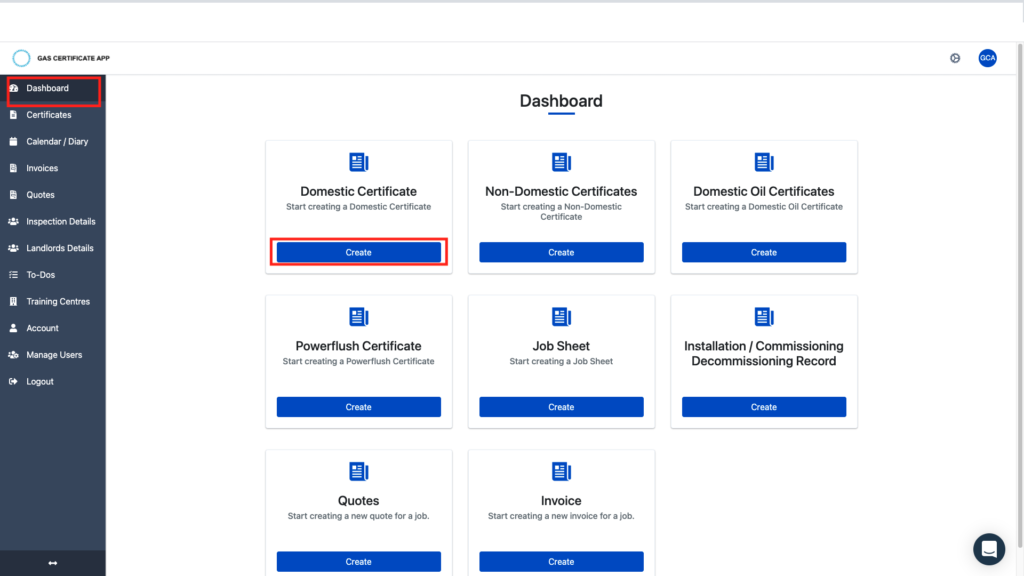
- From the sidebar click on “Dashboard”
- Tap required tab “Domestic” (for example)
- Tap “Homeowner/Landlord Certificate” (for example)
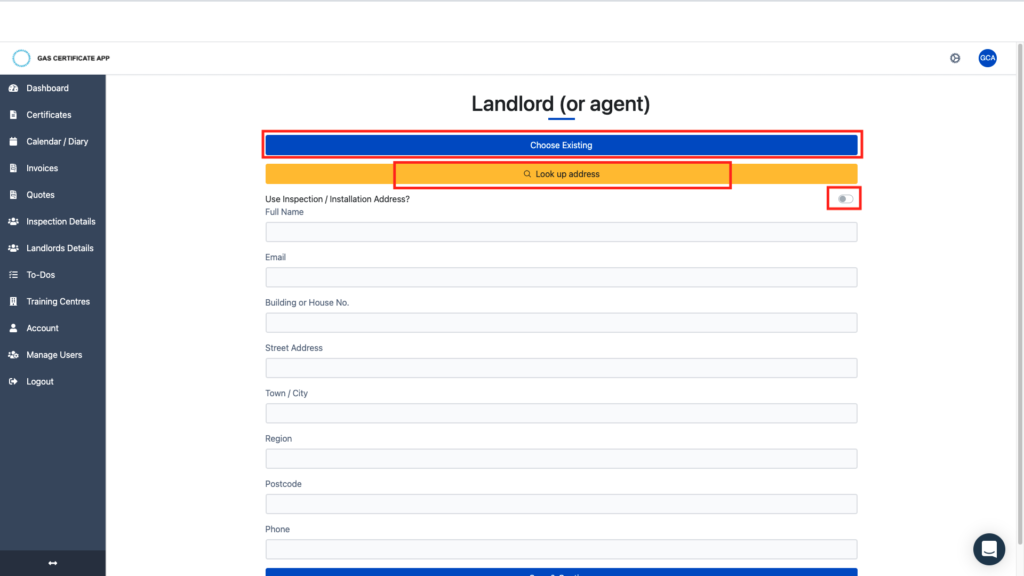
- Tap either “Choose Existing” (if you already have the inspection details saved in the application) or “Look up Address” (the application will auto-complete the address as you type)
- If you selected “Choose Existing” you will then be promoted to select “Create a new record using this data” (this will duplicate the record) or “choose and update this customer” (this will add a certificate to that inspection address) Scroll down the page and tap “Save & Continue”
- Repeat the same process for the Landlord details or toggle the tab “Use Inspection/Installation Address”
- Scroll down the page and tap “Save & Continue”
Appliances
- Tap “Add Appliance”
- Fill in all the required appliance information fields before you tap “Save & Continue”
- To add another appliance tap “Add Appliance” or “Continue” to complete the rest of the certificate.
- Continue to fill out the rest of the required information until you get to the “Final Touches” screen.
Final Touches
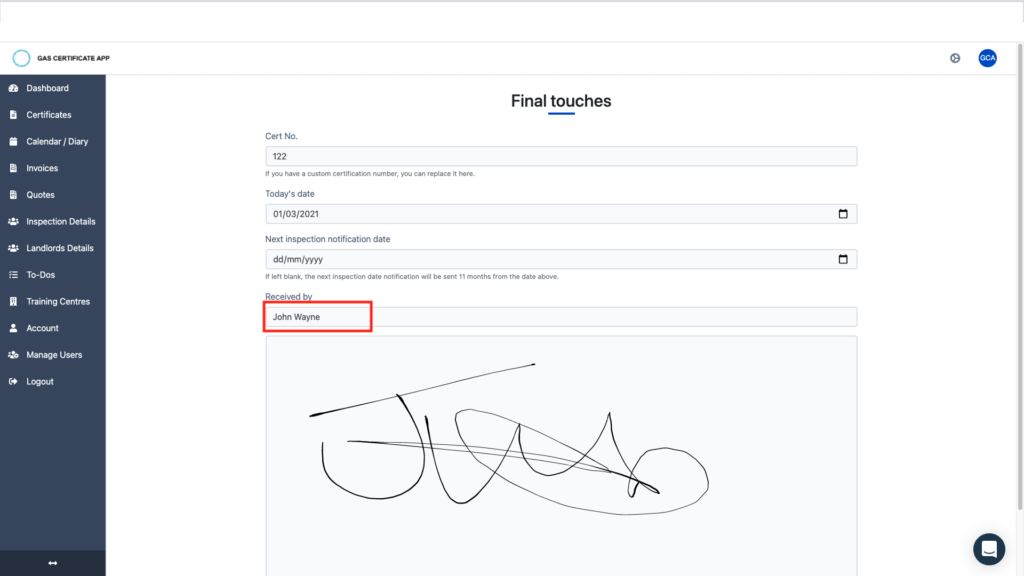
- If you wish to use a custom certification number to replace the generated number tap “Cert No” to manually type in.
- Tap on “Today’s Date” to select correct date.
- Tap to enter “Next Inspection Notification Date” (if left black the notification will be sent via email 11 months from above date).
- Enter Name of the person receiving the certificate in “Received By” and get them to sign in the box below before you “save & Continue”.
Sending the Certificate
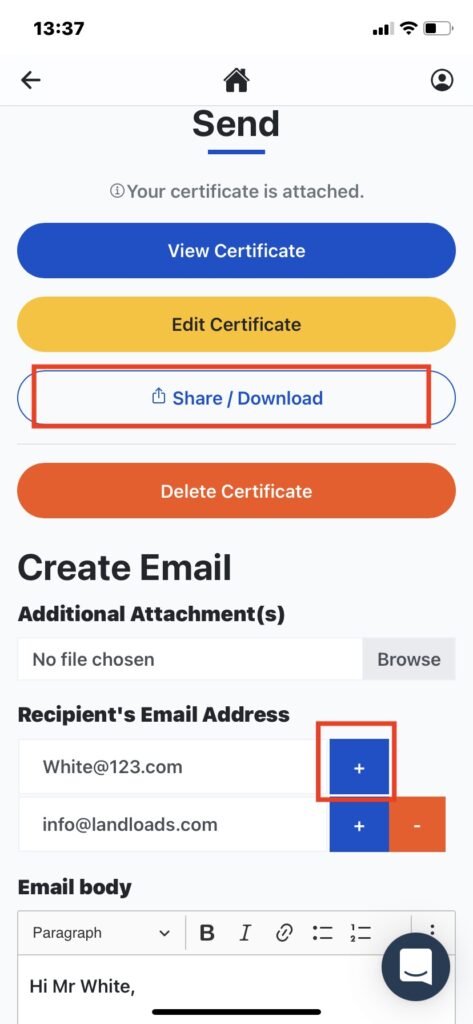
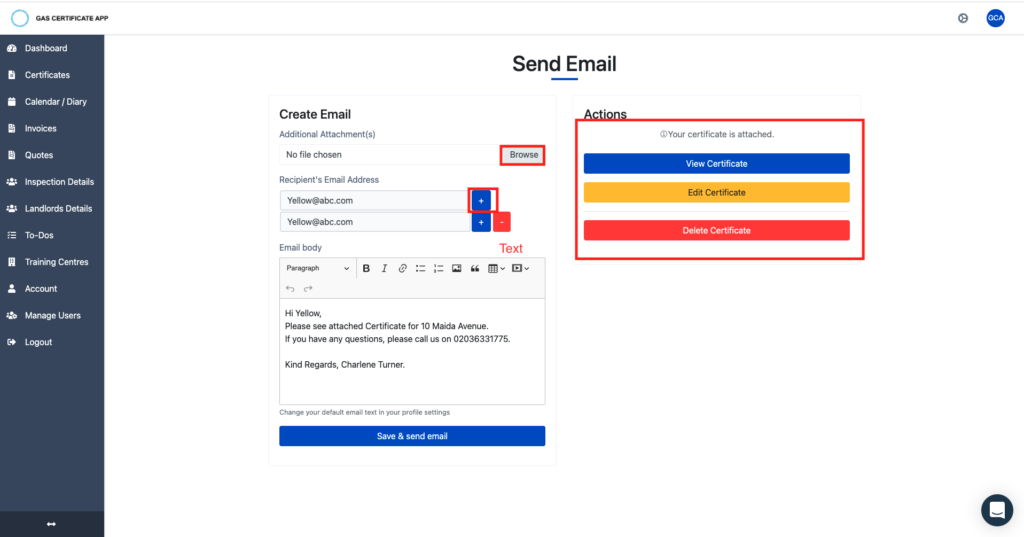
- On this page you are able to view, edit and delete the certificate by tapping to the required button.
- Recipient’s email address will be prefilled from the email addresses from the inspection/landlord details, you can also add multiple emails by tapping the “Plus Button” then scroll down and tap “Save & Send Email”
- Alternatively you can save and send the certificate via other platforms. You can do this by taping the “Share/Download” and selecting your preferred method.
From the Mobile Version
Certificates are linked to Inspection/Landlord Details and Address, You will be required to input this information when creating a new certificate.
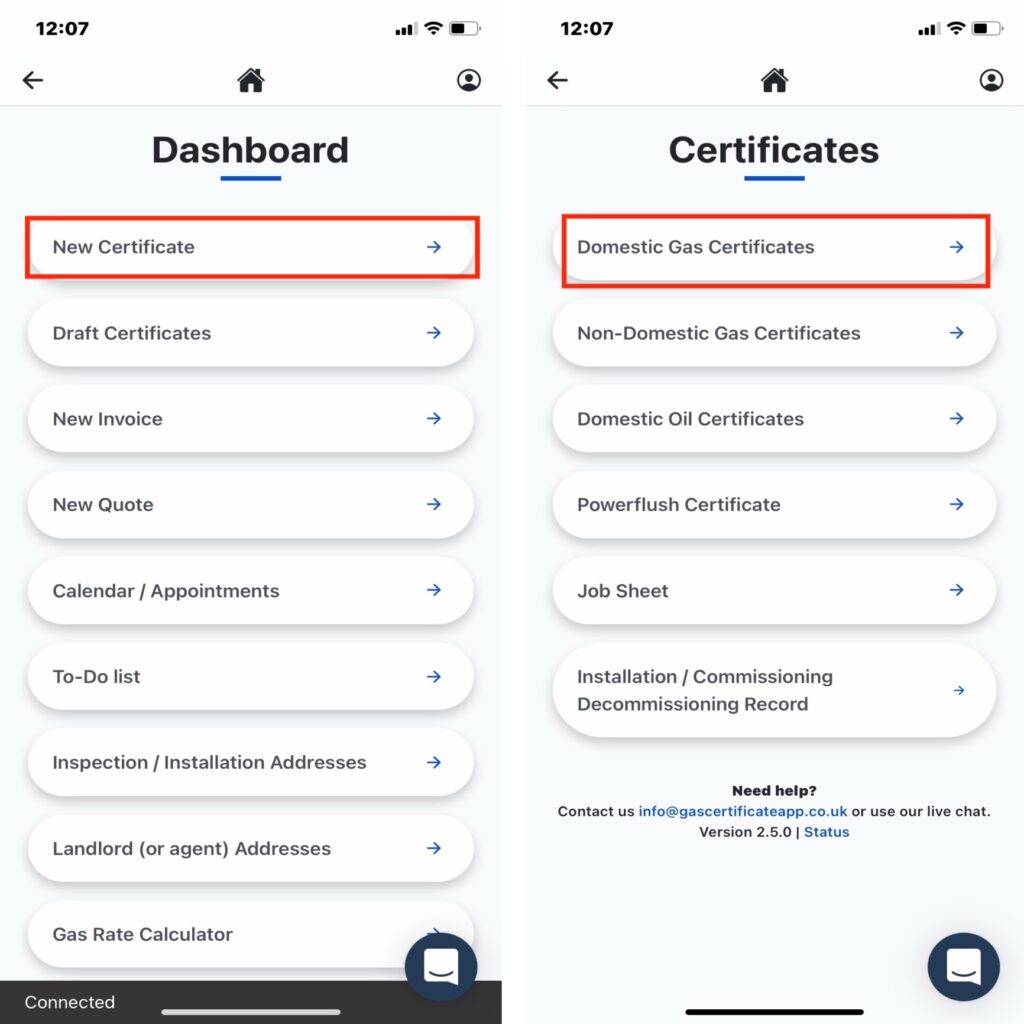
- Tap “New Certificate”
- Tap “Domestic Gas Certificate ” (for example)
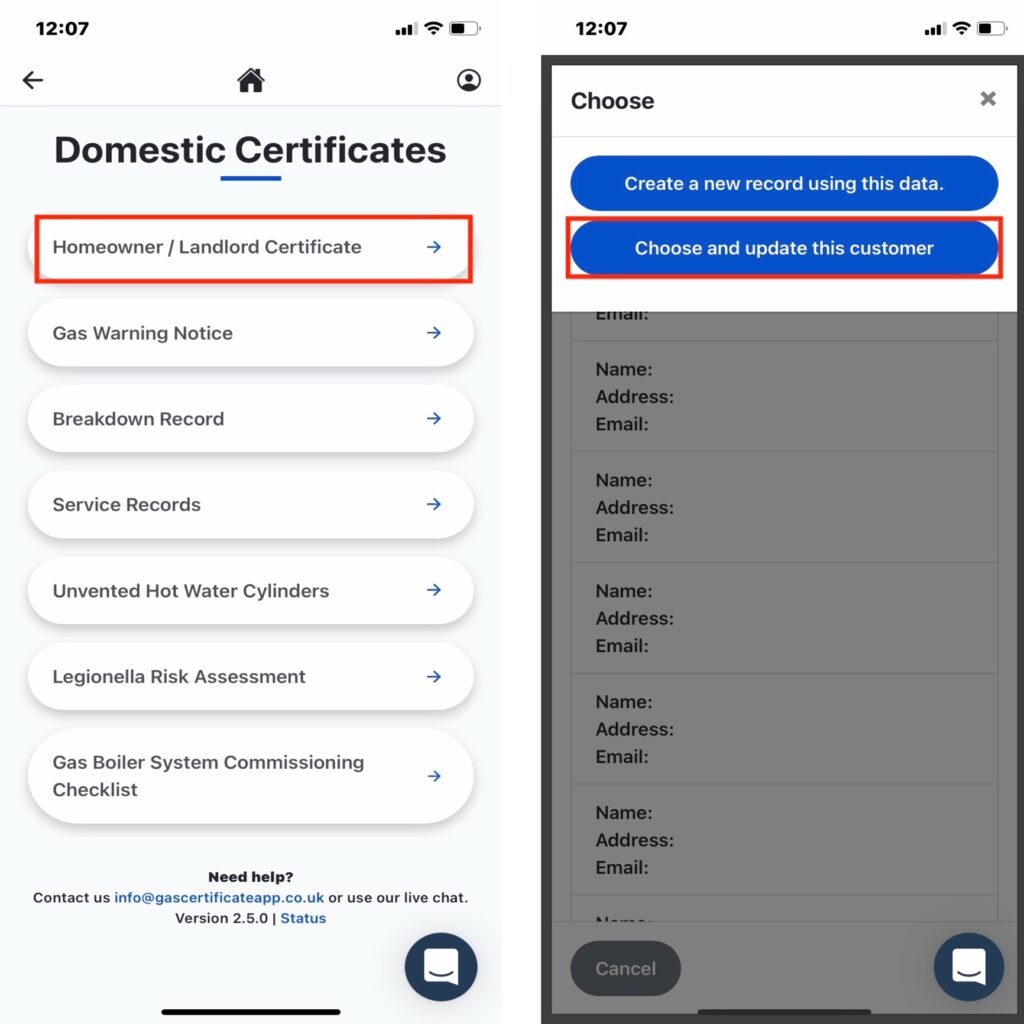
- Tap “Homeowner/Landlord Certificate” (for example)
- Tap either “Choose Existing” (if you already have the inspection details saved in the application) or “Look up Address” (the application will auto-complete the address as you type)
- If you selected “Choose Existing” you will then be promoted to select “Create a new record using this data” (this will duplicate the record) or “choose and update this customer” (this will add a certificate to that inspection address) Scroll down the page and tap “Save & Continue”
- Repeat the same process for the Landlord details or toggle the tab “Use Inspection/Installation Address”
- Scroll down the page and tap “Save & Continue”
Appliances
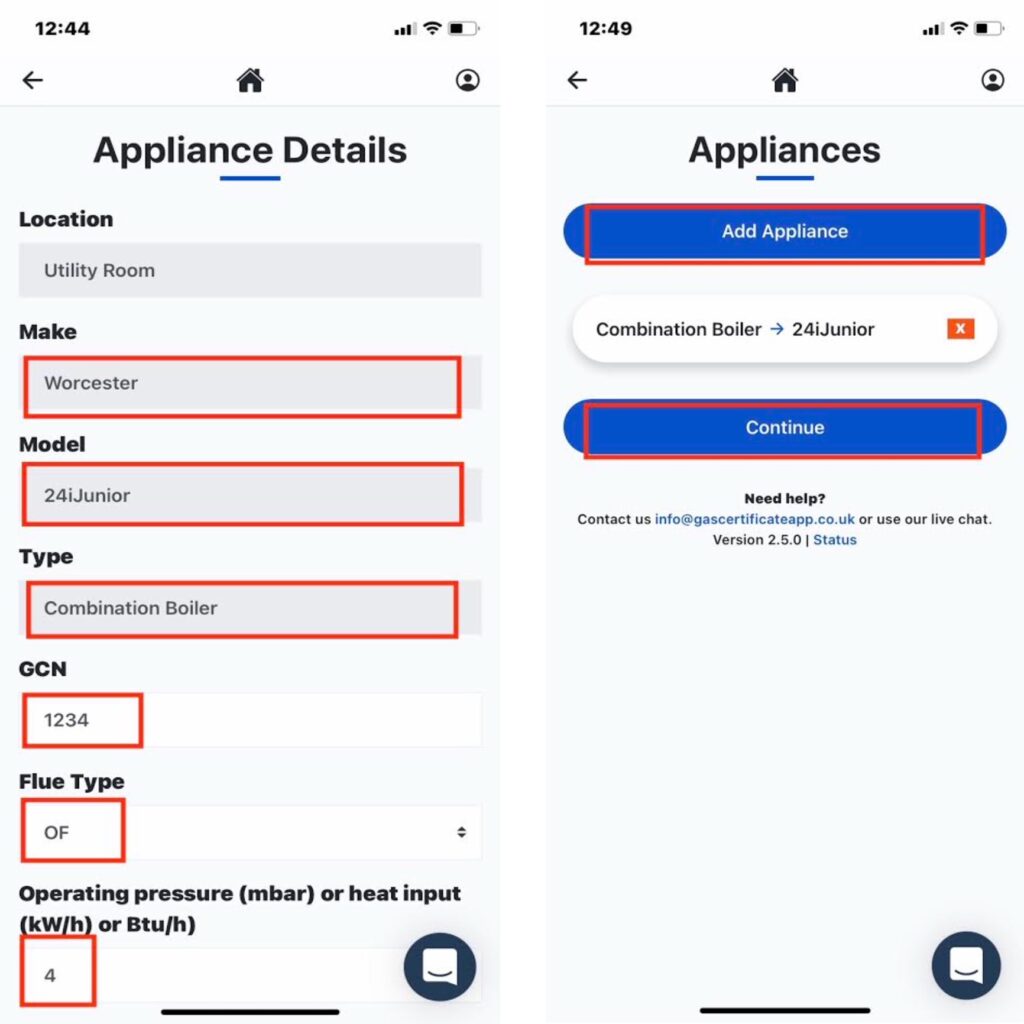
- Tap “Add Appliance”
- Tap on the required location “Airing Cupboard” (for example)
- If the location isn’t listed, manually type in the location and tap “Add” this location will be added to the list for future use.
- Repeat the same process for Make, Model and Type and continue to fill in required appliance information before you “Save & Continue”
- To add another appliance tap “Add Appliance” or “Continue” to complete the rest of the certificate.
- Continue to fill out the rest of the certificate until you get to the “Final Touches” screen.
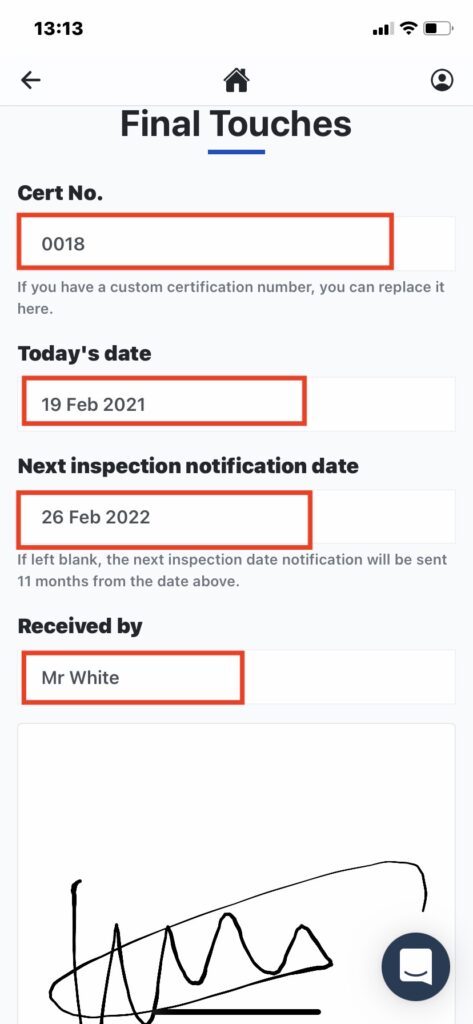
Final Touches
- If you wish to use a custom certification number to replace the generated number tap “Cert No” to manually type in.
- Tap on “Today’s Date” to select correct date.
- Tap to enter “Next Inspection Notification Date” (if left black the notification will be sent via email 11 months from above date).
- Enter Name of the person receiving the certificate in “Received By” and get them to sign in the box below before you “save & Continue”.
Sending the Certificate
- On this page you are able to view, edit and delete the certificate by tapping to the required button.
- Recipient’s email address will be prefilled from the email addresses from the inspection/landlord details, you can also add multiple emails by tapping the “Plus Button” then scroll down and tap “Save & Send Email”
- Alternatively you can save and send the certificate via other platforms. You can do this by taping the “Share/Download” and selecting your preferred method.
